In this post I will describe the procedure of installing Traefik via Docker on a TerraMaster NAS F2-221. The setup will use the docker socket to gain information over newly created containers. Triggered with docker-compose labels a ssl cert by let’s encrypt will automatically retrieved.
The NAS is running the latest TOS 4.2.08 on 2x WD RED 3 TB harddrives with the original installed 2 GB of RAM. No modifications have been done on the hard- or software.
Prerequisites
To understand these steps, you’ll need to know how to control a *nix host via SSH and the usage of vi. SSH needs to be enabled in the TOS settings. Connect as root with the password of your admin user.
For this setup to work we first need to disable “jumpd” on the NAS. This service ensures that you’ll get redirected to the webadmin panel when visiting http://yournas on port :80 and :443 to its corresponding ports of TOS’ webserver. As we want to get our reverse proxy on these ports, jumpd needs to step aside.
Last but not least install Docker through the TOS Appstore, which should be clear by now, i guess.
Apart from the NAS it is required to have a domain name and optionally a dyndns provider, if you’re sitting behind a dynamic ipv4 connection.
Disable jumpd
While connected via ssh we’ll edit /etc/nasips.ini with vi. Put jumpd from YES to NO and save the file. Restart the service to apply the changes: service S99nasips restart. Now the ports are open for Traefik.
Setup Traefik
The whole setup will use a separate bridge as an entrypoint for the connections. To create the bridge you can use
# docker network create web
# docker network list
The create command will return a long ID. The list command lists all created networks by docker. Look for the short ID of the web network. We’ll need to adjust the associated interface later.
Time for Traefik. Create a directory for the files and open docker-compose.ymlin your editor. Paste the following code:
version: '3.3'

services:
  traefik:
    image: "traefik:v2.3"
    container_name: "traefik"
    command:
      - "--api=true"
      - "--api.dashboard=true"
#      - "--log.level=DEBUG"
      - "--providers.docker=true"
      - "--providers.docker.exposedbydefault=false"
      - "--providers.docker.network=web"
      - "--entrypoints.web.address=:80"
      - "--entrypoints.web.http.redirections.entryPoint.to=websecure"
      - "--entrypoints.web.http.redirections.entryPoint.scheme=https"
      - "--entrypoints.websecure.address=:443"
      - "--certificatesresolvers.myresolver.acme.httpchallenge=true"
      - "--certificatesresolvers.myresolver.acme.httpchallenge.entrypoint=web"
     # for debugging purposes uncomment the following line, as lets encrypt is rate limiting false/faulty tries
     # - "--certificatesresolvers.myresolver.acme.caserver=https://acme-staging-v02.api.letsencrypt.org/directory"
      - "--certificatesresolvers.myresolver.acme.email=YOUR-EMAIL-ADRESS@example.com"
      - "--certificatesresolvers.myresolver.acme.storage=/letsencrypt/acme.json"
    ports:
       - "80:80"
       - "443:443"
    volumes:
      - "./letsencrypt:/letsencrypt"
      - "/var/run/docker.sock:/var/run/docker.sock:ro"
    labels:
      - "traefik.enable=true"
      - "traefik.http.routers.api.rule=Host(`traefik.example.com`)"
      - "traefik.http.routers.api.service=api@internal"
      - "traefik.http.routers.api.middlewares=auth"
      - "traefik.http.middlewares.auth.basicauth.users=YOURUSER:ENCRYPTED-PASSWORD-BY-HTPASSWD"
      - "traefik.http.routers.api.entrypoints=websecure"
      - "traefik.http.routers.api.tls.certresolver=myresolver"
    networks:
      - "web"

networks:
  web:
    external: true
Please change these lines accordingly to your needs:
--certificatesresolvers.myresolver.acme.email – Your email address for let’s encrypt
traefik.http.routers.api.rule – Put your domain for Traefik between the backticks
To access the dashboard, you’ll need to generate a username and password keypair by using apache’s htpasswd tool. If you haven’t got htpasswd at hand you can find generators online. But keep the security of an online service in mind. After the successful generation put your credentials into this line:
traefik.http.middlewares.auth.basicauth.users– if your encrypted password string contains $, you’ll need to escape it with another $ symbol. “FOO$BAR” has to be “FOO$$BAR”.
You can save the file for now. Additionally we need to create a separate static config with the name traefik.toml:
[global]
  checkNewVersion = true
  sendAnonymousUsage = false

[entryPoints]
  [entryPoints.web]
    address = ":80"

  [entryPoints.websecure]
    address = ":443"

[log]

[api]

[ping]

[providers.docker]
Save and exit the file. Now we’re ready for a quick test. Let’s spin up this instance of Traefik by executing docker-compose up. It will download the image, takes our changes into account and starts everything that’s needed.
As soon as you see the line time="2021-01-14T17:33:59Z" level=info msg="Configuration loaded from flags." we can shutdown the container again by pressing CTRL+C.
Congratulation! 🎉 Traefik is set up successfully. Unfortunately it won’t connect to the internet by now.
Changing the network interface and routes
As explained in my previous post (Docker 0 : Me 1) the bridge interface and route looks kinda suspicous. We’ll adjust both and we’ll be fine.
To get information about the selected network, execute docker network inspect web. It will output a lot of stuff. The relevant parts are inside IPAM -> Config: Subnet & Gateway. Keep these IPs in mind. In my case it’s the subnet 172.20.0.0/16.
First off, we’ll delete the faulty route. List all routes with route -n . You’ll get a nice list of ip subnets and devices. The interesting part is the route for your bridge. You can identify it by looking for br-<Network ID from above>. In my case it’s br-e28eb058d071.
# route -n
Kernel IP routing table
Destination     Gateway         Genmask         Flags Metric Ref    Use Iface
169.254.0.0     0.0.0.0         255.255.0.0     U     0      0        0 br-e28eb058d071
I’ve stripped the output down to the interesting parts. To delete the route use ip route del 169.254.0.0/16 dev br-e28eb058d071. After that we’ll raise the correct route via ip route add 172.20.0.0/16 dev br-e28eb058d071.
Pay attention to replace the bridge name as well as the subnet to your scenario. After adjusting the route, let’s add the gateway ip to the interface with ip addr add 172.20.0.1 dev br-e28eb058d071.
Running Traefik
The container is ready, the interface and routes are ready. Time to get the machine running! Start Traefik by running docker-compose up -d. This time the container will run in the background because of the -d parameter, so you won’t see any log output.
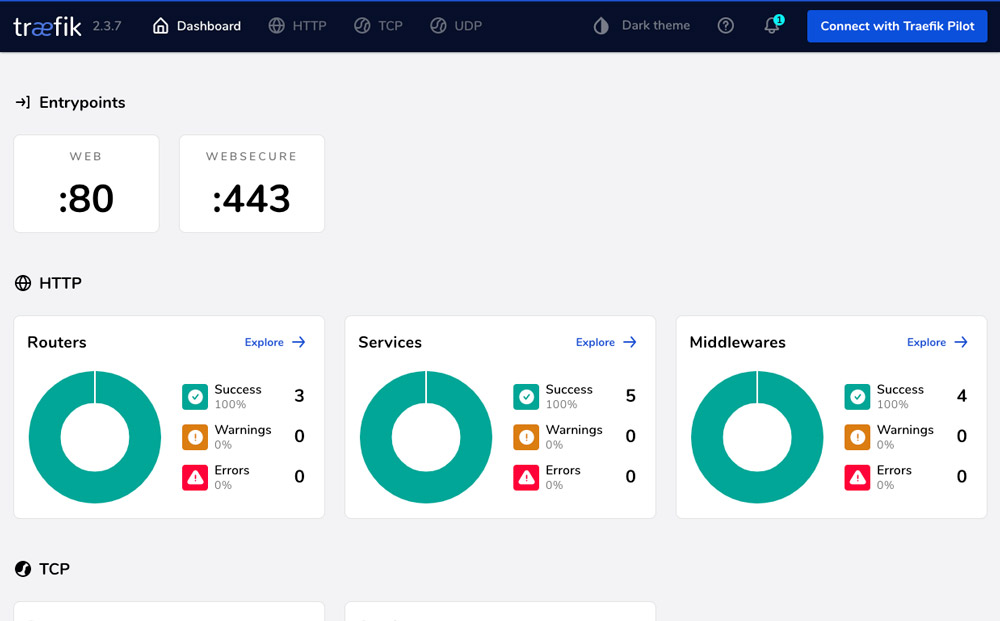
After a short time Traefik is reachable through your browser. Go to the domain you’ve entered in the config and add /dashboard/ to it like:
https://traefik.example.com/dashboard/
The trailing slash is needed! You should be asked to enter your credentials, that has been written into the docker-compose file. Finally you’ll be greeted with dashboard of Traefik.
Conclusion & Todo
What we’ve achieved so far:
- Docker is running
- Created a separate bridge for our reverse proxy net
- Activated the bridge so containers can have outgoing connections
- Set up Traefik
- Visiting the Traefik dashboard
- Getting SSL certs automatically for every container/services just by hooking it into traefik
What’s left on the list:
- Disabling jumpd on NAS reboot
- Install another container like Nextcloud to further test the system
This is just great! From this point on you can create additional services via docker or docker-compose and use them right away. My next post will cover the installation of Nextcloud via docker-compose with the needed labels to interconnect the container with Traefik.
Do you have any questions, or did an error occur while going through the steps? Get back to me on the comment section!
Update: follow-up tutorial is available now: Installing Nextcloud on F2-221